Being a fan of woodworking, I’ve faced many challenges. These come up when I’m redoing wood finishes. A common question people ask is, “Can you stain over Danish oil?” The answer is more complicated than a simple yes or no.
I tried to fix a pine project I didn’t like by adding Minwax on top of Danish oil.1 This made the surface sticky because the oil had sealed the wood. I then tried to fix it by removing the mess with paint thinner. I sanded it and applied the stain again. This event taught me the tricky nature of Danish oil. And it showed how important it is to know the right way to work with wood finishes.
Getting confused while trying to stain over Danish oil is normal. It shows that we must be careful and thoughtful when starting such projects. Knowing about Danish oil and how it works with other finishes is crucial. Also, preparing the surface correctly and applying techniques properly is key to a successful wood finish repair.
Understanding Danish Oil and Its Effects on Wood
When improving wood finishes, Danish oil is key. It mixes oil and varnish to make a tough, water-resistant finish. It dries fast, letting you add more coats quickly.2
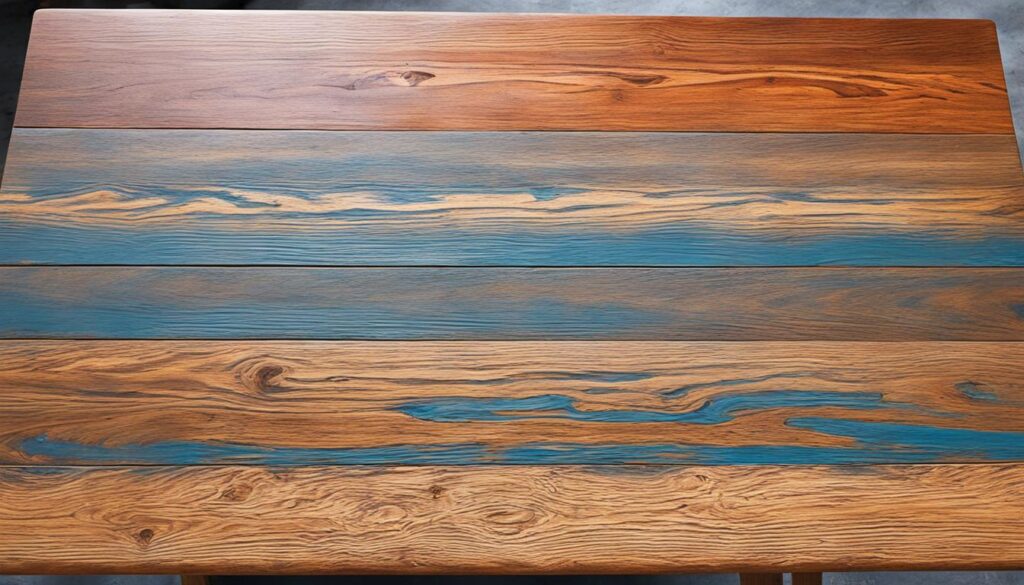
Danish oil can give your wood projects different finishes, from satin to gloss. This means you can choose the look you want. Some oil stains even protect against UV and water, helping your wood last longer.2
But, staining over Danish oil can be tricky because it might make the color too light. To avoid this, the advice is to apply the stain first. Let it dry before you put on the final finish.1
It’s a must to be careful when using stains and oils. Wear protective gear and work in a well-ventilated space. Also, make sure to throw away used items correctly.2 Never put Danish oil over polyurethane. They don’t stick well together.2
Knowing how Danish oil works with other finishes is important. With the right advice, you can overcome challenges. This way, you can create a great look for your wood projects.23
Attempting to Stain Over Danish Oil: A Learning Experience
The third source talks about the user’s Danish oil experience positively. Trying to stain over it is seen as a lesson learned.4 Waiting for the stain to dry first, then using a Watco finish, like polyurethane, would have been smarter.
Using Danish oil and Watco alone can bring a nice, dull finish that’s easy to keep up.5
When you think about using poly will work, they say go for a based polyurethane for the last touch. Put the poly over the Danish oil, and keep adding coats of polyurethane till you get the shine you want.5 The trick is to keep applying the poly until it looks right.5
For those keen on a true oil finish, choose Minwax tung oil finish or something like it. Use it after the poly to help the wood. It acts as a sealer and makes the wood dry better.4 Before the dewaxed tung oil, gently rub the wood with steel wool. This helps the tung oil stick and penetrate well.5

Can You Stain Over Danish Oil? Exploring the Possibilities
This part talks about how tough it can be to stain over Danish oil. We look into ways to make it work. Making sure the stain and finish match is key. Also, the Danish oil must fully cure first. You can clean with mineral spirits>, use a dewaxed shellac as a base, or put on satin polyurethane. It’s important to stick to the right drying and application times for best results.6
Thinking of refinishing wood with a new stain after Danish oil? Make sure the Danish oil dries well first, like for 24 to 48 hours. This keeps the new stain from conflicting with the old oil.6 Doing this avoids trouble down the line.6
For the stain, try mixing it with Danish oil in a 1:1 ratio. This helps get the color you want.6 A pre-stain conditioner can also stop blotchiness in the finish.6
Let the stain fully dry first, often in 24 hours. Then, you can put on Danish oil.6 Check if the wood’s ready by using a moisture testing method. Put plastic over it for 24 hours. If there’s no water under the plastic, you’re good to go.6
For a topcoat, try a satin polyurethane. It’s strong and looks good by itself.6 Or, put a dewaxed shellac first to avoid problems between coats.6
Always pay attention to the drying and curing times for everything. This is super important. With the right tips and care, you can stain over Danish oil well.6
Alternative Approaches to Revamping Wood Finishes
If staining over Danish oil proves tough, don’t worry. There are other ways to make wood finishes look great again. You can try different oil-based finishes such as tung oil7 or linseed oil7. These are known for being tough and natural. Also, water-based polyurethane or lacquer finishes might work. What you choose depends on how you want the finish to look and how much protection it needs.
Sometimes, it’s best to start over by removing the old Danish oil. This is true if it doesn’t seem to work well with new finishes.7 Talking to a pro or visiting a store like Woodcraft7 can give you great advice. They can help you figure out the best plan for your project. Plus, they’ll teach you what to do to get the look you want7.
Take Jim, for example. He’s a pro at working with wood. He used a varnish blend over Danish oil and was happy with the results. He put on two or three coats of a wiping varnish7. This gave a shiny, tough finish. But, remember, wait for the Danish oil to dry completely, usually in less than a week. Also, clean off any dust before you add the topcoat.7
Source Links
- https://woodweb.com/knowledge_base/Darkening_a_Danish_Oil_Finish_on_Walnut.html
- https://www.woodenbowties.com/is-it-ok-to-stain-wood-and-then-apply-danish-oil-after/
- https://www.rawlinspaints.com/blog/wood-oils-no-nonsense-guide/
- https://www.ana-white.com/blog/2016/08/danish-oil-stains-seals-protects-one-easy-coat
- https://sawmillcreek.org/showthread.php?231583-Anyone-with-experience-with-WATCO-Danish-Oil
- https://nordchem.co.uk/blogs/danish-oil/can-i-use-danish-oil-over-wood-stain
- https://www.mychemicalfreehouse.net/2021/01/natural-finishes.html
Welcome to WoodCraftYard.com, your one-stop destination for all things woodworking! I’m Oliver Candler, a dedicated woodworking aficionado and the creative mind behind this virtual woodworking haven. With a deep-rooted love for craftsmanship and a keen eye for detail, I am on a mission to share my passion for woodworking with fellow enthusiasts like yourself.
As a seasoned woodworker, I am committed to providing you with valuable insights, practical tips, and inspiring project ideas to help you unleash your creativity and master the art of woodworking. Whether you’re a seasoned pro or just starting out on your woodworking journey, join me as we carve, sand, and saw our way through the world of woodworking together.
Let’s embark on this woodworking adventure, where every knot, grain, and finish tells a unique story. Together, let’s craft, create, and build something truly extraordinary at WoodCraftYard.com!